“What were your camera settings?” Of all the questions I get asked about my work, this is easily the most common. The problem with the question is that unless you’re taking the exact same shot from the exact same place at the exact same time of day with the exact same lighting and conditions, with the same Sony camera and lens, my settings for that particular shot don’t matter because they were only relevant for that exact shot and how I wanted to shoot it. So instead of just answering the question, I’m going to show you my process so that you can apply it to your gear and get yourself set up for perfect landscape exposures in any situation.
Note: Follow #AICdoesNewZealand as Mike and other members of the Alpha Collective explore the landscapes of New Zealand’s South Island.
First: See The Light
The best single piece of advice I can give about settings is to decide how you want to capture the scene, and then properly expose for light. If you do this correctly, you’ll get the results you’re looking for. How you want to capture a scene sometimes calls for a specific shutter speed to pull off the desired effect. Other times, your aperture will be the key to getting your shot. Sometimes your aperture or shutter speed won’t have much of an effect on your shot at all (as long as you’re properly exposing for light). Below, I’ve included a variety of different scenarios below to help guide you through some different kinds of landscapes shots, how I approached them, and what settings I chose to compose and capture the images I had in mind.
The Basics Of Shutter Speed, Aperture & ISO
Before we get to the specific shots, here’s a quick bit on how shutter speed, aperture and ISO affect your image. These are the three variables in image exposure. If you’re a relatively new photographer, you may find this helpful. Otherwise, feel free to skip down to the first example photo.
Shutter Speed
Simply put, it’s the amount of time your camera lets light make an exposure. That is, how long your shutter is open. Fast shutter speeds like 1/1000-sec. and faster will freeze action, capturing moving objects like they were standing still (like you see in most sports and wildlife photography). Longer shutter speeds like 1/3-sec. and slower will show movement and blur in moving objects like a runner or a tree on a windy day, but have no effect on objects that are still, like buildings. However, a longer shutter speed makes it more difficult to get a sharp image if you’re handholding the camera. A general rule of thumb is that you’re minimum hand-holding shutter speed is about 1/focal length of the lens. (i.e.: for a 50mm lens, 1/50-sec. You can extend that using in-camera image stabilization (like the Sony IBIS system) as well as lens stabilization (like Sony OSS), but as you go slower with the shutter speed, at some point you’ll need a tripod.
Aperture
The aperture or “f/stop” is how much light your lens lets into the camera while your shutter is open. Aperture also has an effect on how much of your image is in focus—the depth of field. Low f-stops like f/1.8 let in a lot of light. Images taken at a low f/stop also have a very small plane of focus, meaning one part of the image will be in focus, and the rest will be blurry. This effect is exaggerated the closer the point of focus is to your camera. Portraits are frequently shot at low apertures to bring attention to the model’s face (and eyes) and blur out the background. High f/stops like f/16 and higher let in very little light. They also result in images with a much greater depth of field, meaning the higher the f/stop number, the more of the image will remain in focus front to back (foreground to background).
ISO
Think of ISO as kind of a cheat to let “artificial light” into your camera. There are times when a very low aperture simply doesn’t let in enough light, and you don’t have the luxury of shooting at a longer shutter speed because you don’t want your subject to be blurry. That’s when you boost the ISO. It will artificially brighten your images. If this sounds too good to be true, it is, because it can come at the cost of image quality. Usually, the higher the ISO, the more noise/grain you will notice in your images. I’ve always been impressed with Sony’s high-ISO performance, which allows ISO to be pushed pretty high before you’ll see any real deterioration in image quality. It’s generally ideal to keep your ISO as close to 100 as you can. The lower the ISO, the less noise. That being said, I’ve taken beautiful images with my Sony cameras at 4000 ISO.
Also, keep in mind that it’s better to have a little noise (higher ISO) in an image versus a shot that’s out of focus because the shutter speed was too slow. (For more about this, check out this article by National Geographic pro and Sony Artisan Ira Block.)
That covers the three variables of exposure. Now let’s have a look at some examples.
MONUMENT VALLEY
Body: Sony α7R II
Lens: Sony 12-24mm f/4.0 G lens at 18mm
Settings: 0.8-sec., f/9.0, ISO 100
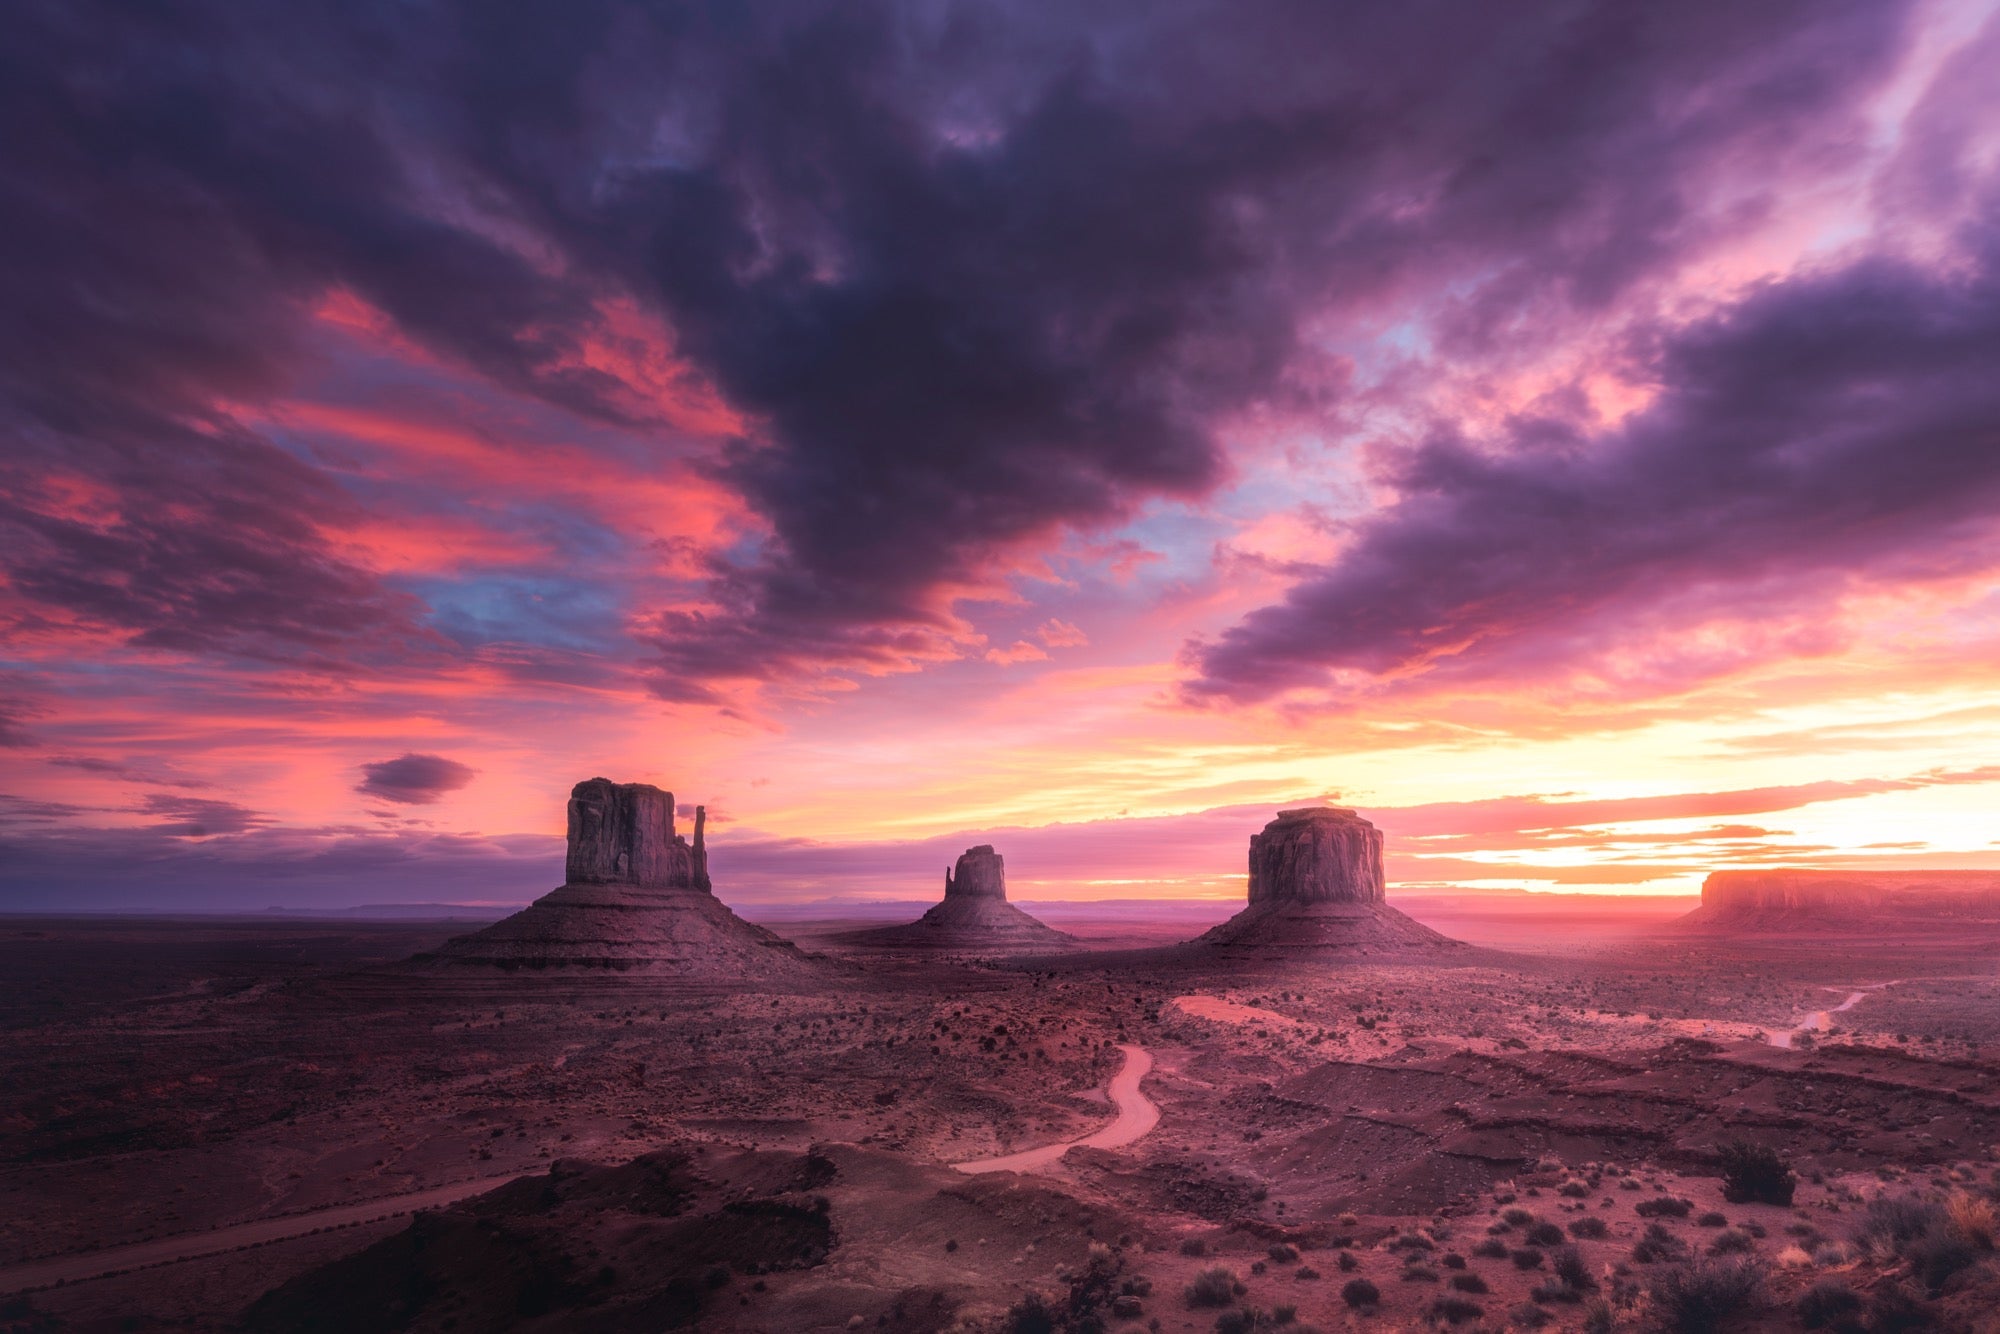
QUICK TIP: If shutter speed is a relative non-factor in your shot, choose your lens’s sharpest aperture (generally between f/8-f/11) first, then select shutter speed.
Let’s start simple: the classic sunrise/sunset shot of a wide-open landscape. This was a single exposure taken at sunrise on a late-January morning at Monument Valley right near the Utah/Arizona border. The first thing I do when I’m setting up my shot is to think about how I want it to look. I ask myself “is there any movement in the frame where I need to concern myself with shutter speed? Do I want the entire scene in focus, or just one element?” Given the nature of the composition, the entire scene was perfectly still except for some very slow-moving clouds, so I was free to use a longer shutter speed without worrying about getting any motion blur from moving objects. And I didn’t have to worry about choosing between focusing on something very near or very far from my camera. Everything in the frame was a good distance from me, and with a mid-range aperture, everything would be in focus (more on that later). In short, this was a very simple, straightforward shot.
So, I chose f/9.0. Every lens is different, but generally, lenses produce their sharpest results between about f/7-f/11. My shutter speed was more or less irrelevant as it pertained to how the image would look. Since nothing was moving in the shot, I was free to make the aperture my number one concern, and set it at its sharpest point. Now all I needed to do was set my shutter speed to let the proper amount of light into the camera. In this case, that was 0.8-sec. I had my camera on a tripod to keep it perfectly still, put it on a 5-sec. timer to eliminate any camera shake from pressing the shutter button, and this was the result.
BIG ISLAND BLUE WAVE
Body: Sony α7R II
Lens: 18mm f/2.8 lens
Settings: 1/3-sec., f/22, ISO 100
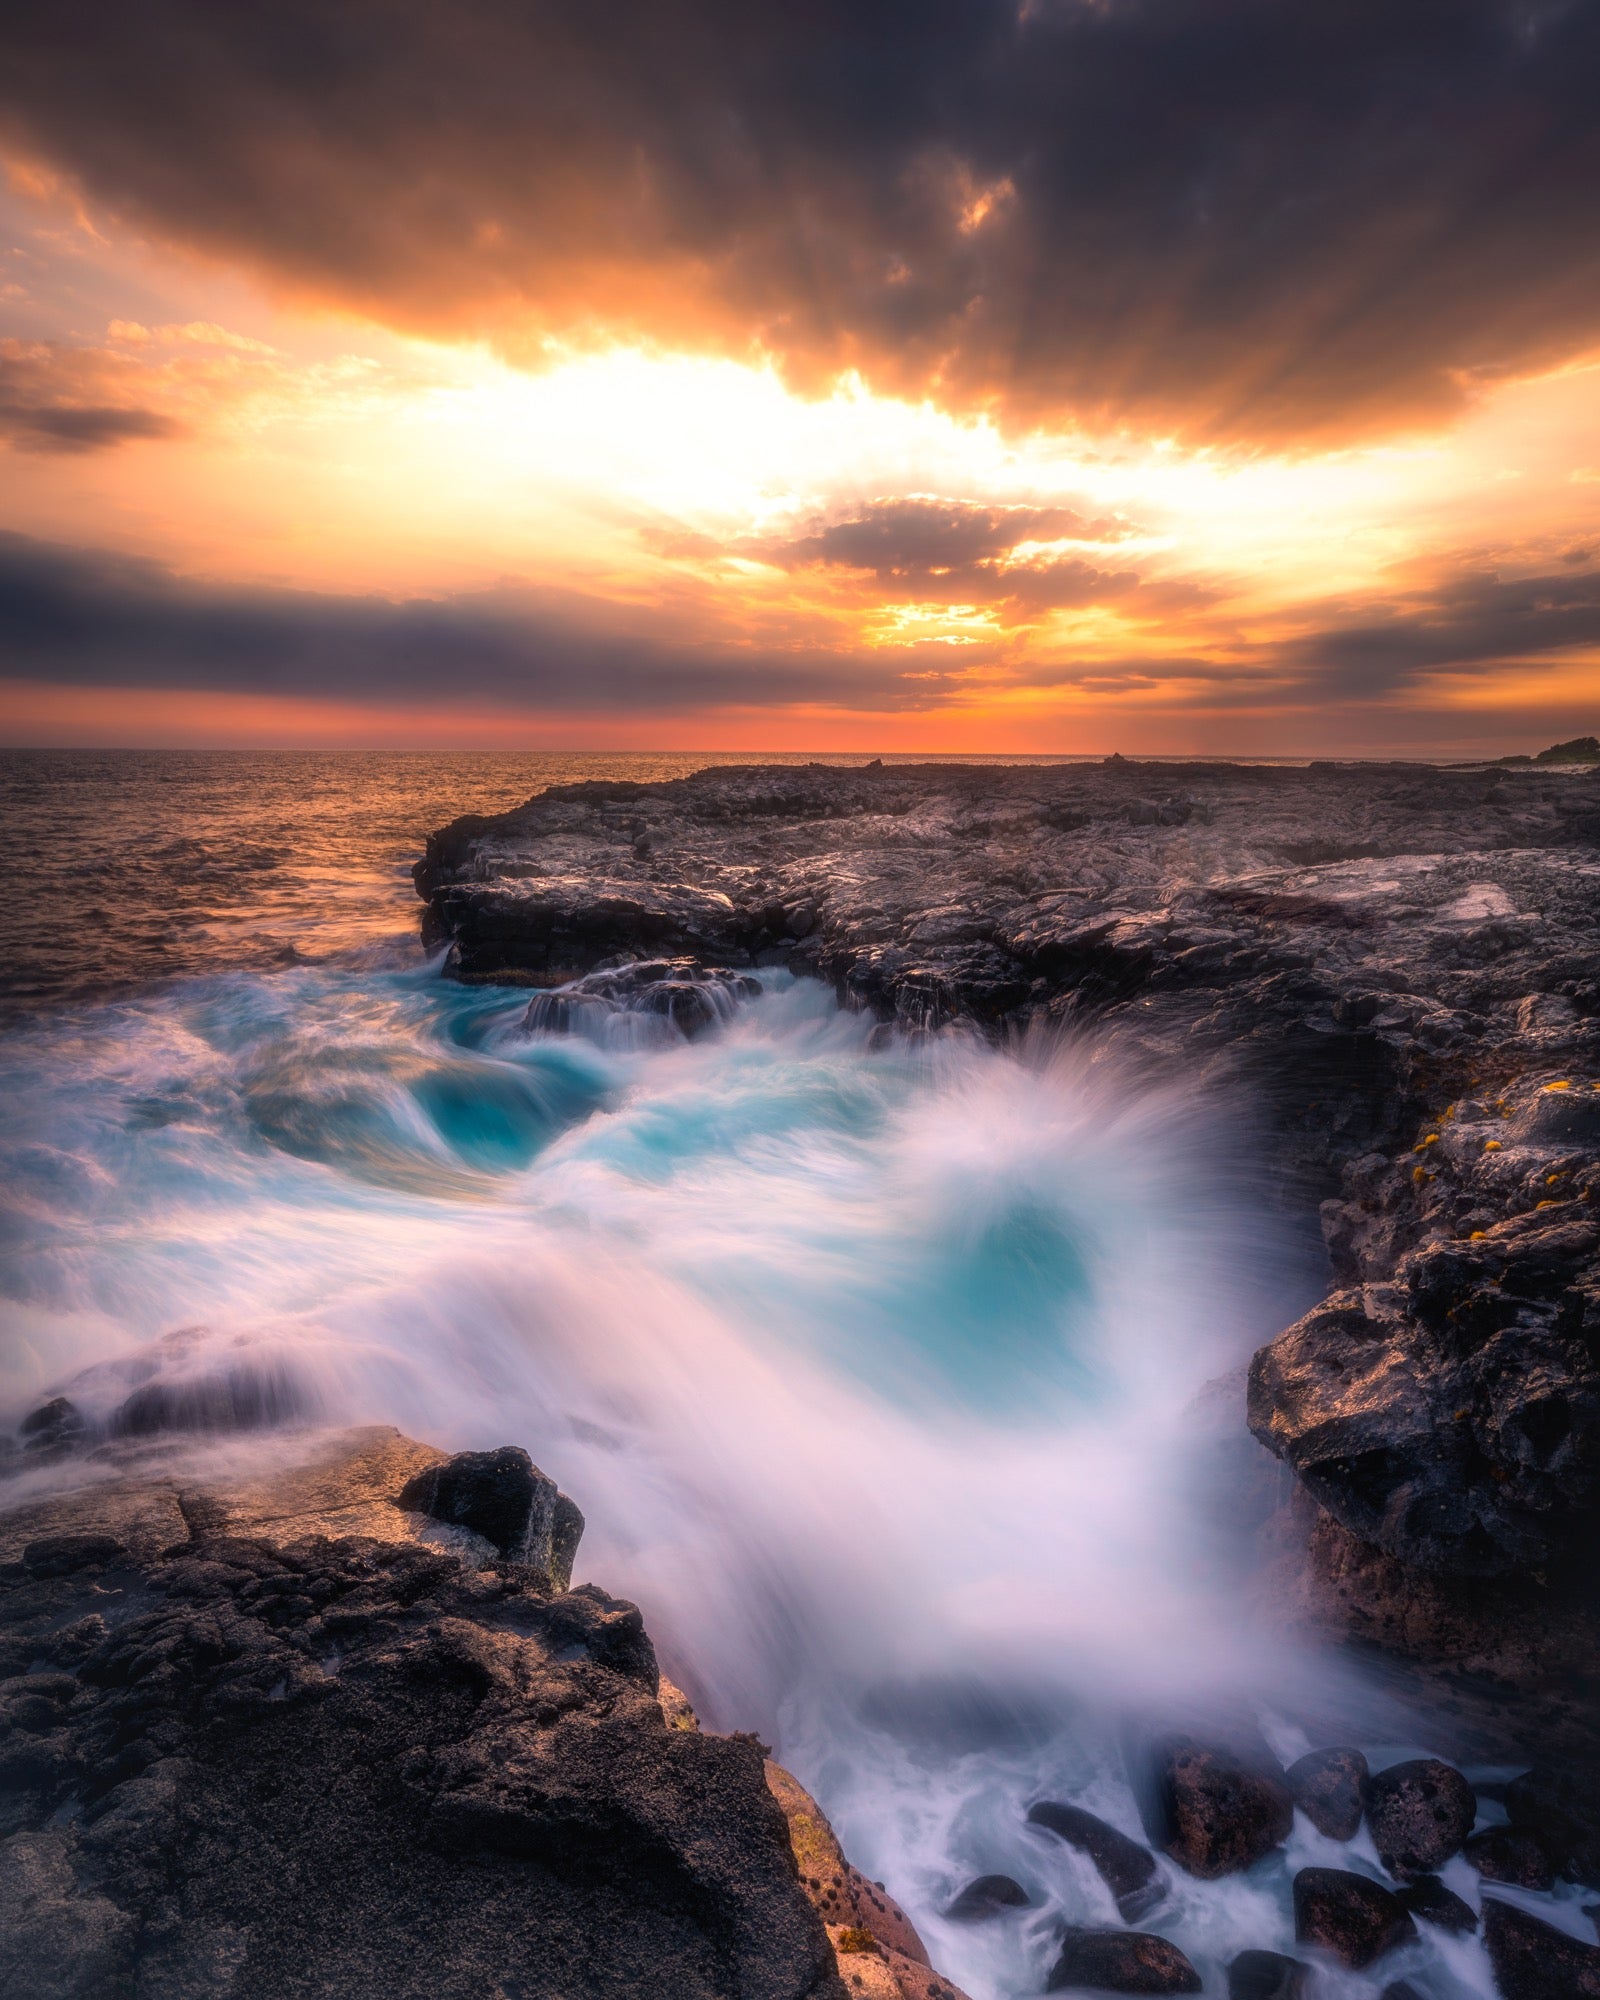
QUICK TIP: For smooth water with some texture, choose a shutter between 1/3-1/6s.
There’s an art to shooting moving water. Some photographers have made their entire careers from it, and for good reason. When it’s done properly, you can produce some amazing images with textures and details and movement that really draw you in. This particular shot was taken on the Big Island of Hawaii at sunset. Before I get into how I shot this, I just want to say that there is no right or wrong way to shoot water. There are a ton of different ways to do it, all yielding different results. If you’re looking to smooth out all of the details from water, you might take a single exposure of several minutes. To capture the power and detail of moving water, you could use a very quick shutter speed of 1/1000-sec. or faster to freeze the action. The effect I chose is in between, preserving some details and motion, but also smoothing out the water just enough to give it a softer effect. I’ve found that for ocean waves coming onto the beach and rocks, somewhere between 1/3 – 1/6-sec. produces good results. But it all depends on the waves and your personal taste.
The in-camera stabilization (IBIS) is incredible in the Sony cameras. I’ve shot usable images handheld with a 1-sec. exposure. However, for anything slower than 1/25-sec., I’d recommend using a tripod. It’s best to experiment a bit with the waves and see what shutter speed gives you the results you like best. Shoot a number of different waves and vary your shutter speed until you find the sweet spot. Shutter speed is priority one for shots like this. With a shutter speed of 1/3-sec., I needed to crank my aperture all the way to f/22. In retrospect, I should have turned my ISO down to 50 so I could have shot at f/18, but I was rushing to get into position and capture the rays from the sun before it ducked completely behind those clouds. At any rate, once I decided on my 1/3-sec. shutter speed, I just continued shooting wave after wave until I got a result I was really happy with.
GRAND TETONS SUNSET
Body: Sony α7R II
Lens: Sony 70-300mm f/4.5-5.6 lens at 183mm.
Settings: 1/3200-sec., f/5.6, ISO 400
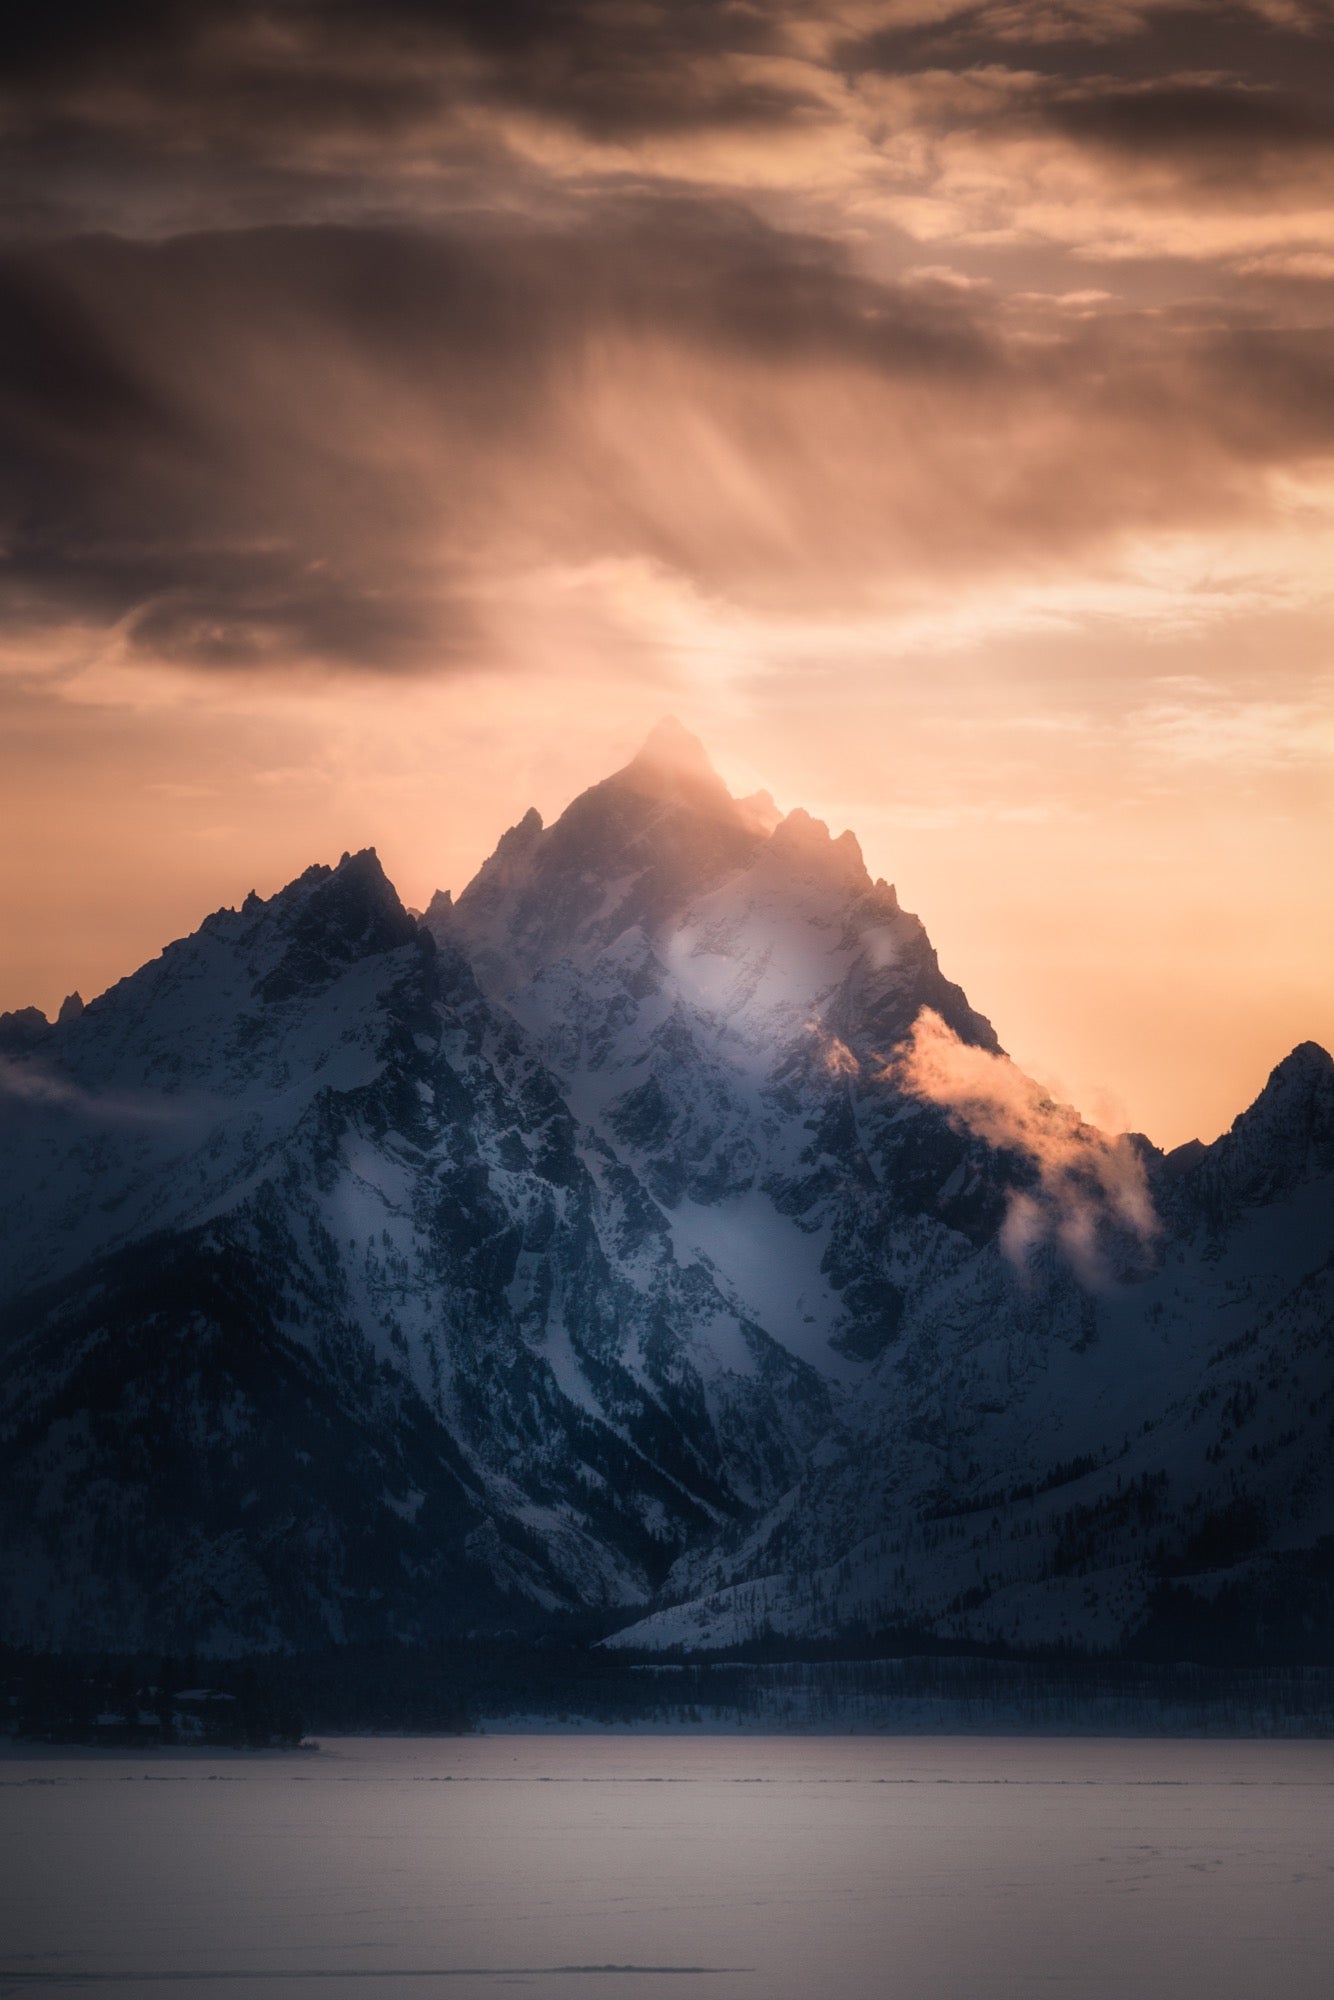
QUICK TIP: If you’re shooting handheld, choose a shutter speed equal to or faster than 1/focal length (for example, Shoot 1/300-sec. or faster if you’re shooting at 300mm).
When I first started shooting natural landscapes, I was locked into using wide-angle lenses to try to capture as much of these epic places and skies as possible. Shooting like this will no doubt produce some fantastic shots, but there’s a lot more to these scenes to be uncovered using long lenses. Natural features like buttes, canyons and mountains can be appreciated for their scale, but also for some of their finer details – and that’s where the longer lenses come into play. Mountain ranges always have the best cloud action surrounding their peaks, and are one of my favorite things to photograph. During a recent road trip out west, we had some incredible clouds at sunset at Grand Teton National Park.
After grabbing some wide-angle shots, I switched to my Sony 70-300mm lens to get in tighter on the peak and clouds. We arrived just as the sun was setting, and in my rush to shoot the light before it disappeared, I’d left my tripod in the car. We still had plenty of light, and I wanted to ensure I minimized any shake I’d have from shooting handheld so I dialed in a speed of 1/3200-sec. The rule of thumb to follow is 1/focal length. At 183mm, 1/200-sec. (1/183 to be exact) would have been the slowest I’d want my shutter speed. As I mentioned earlier, the in-camera stabilization in the Sony is insanely good, and has saved me many times. But with plenty of light available, I left plenty of margin for error with a speed of 1/3200-sec. This is a personal preference. There are ways of editing shots that are underexposed to still make them usable – but a blurry shot is a throwaway. So when given a choice, I’m perfectly fine introducing some ISO if needed to ensure my shots are focused and don’t suffer from any camera shake. And next time, I’ll be sure to bring my tripod…
ARCHES ASTROSCAPE
Body: Sony α7R II
Lens: Sony 12-24mm f/4.0 G lens at 12mm.
Settings: 31-seconds, f/4.0, ISO 4000
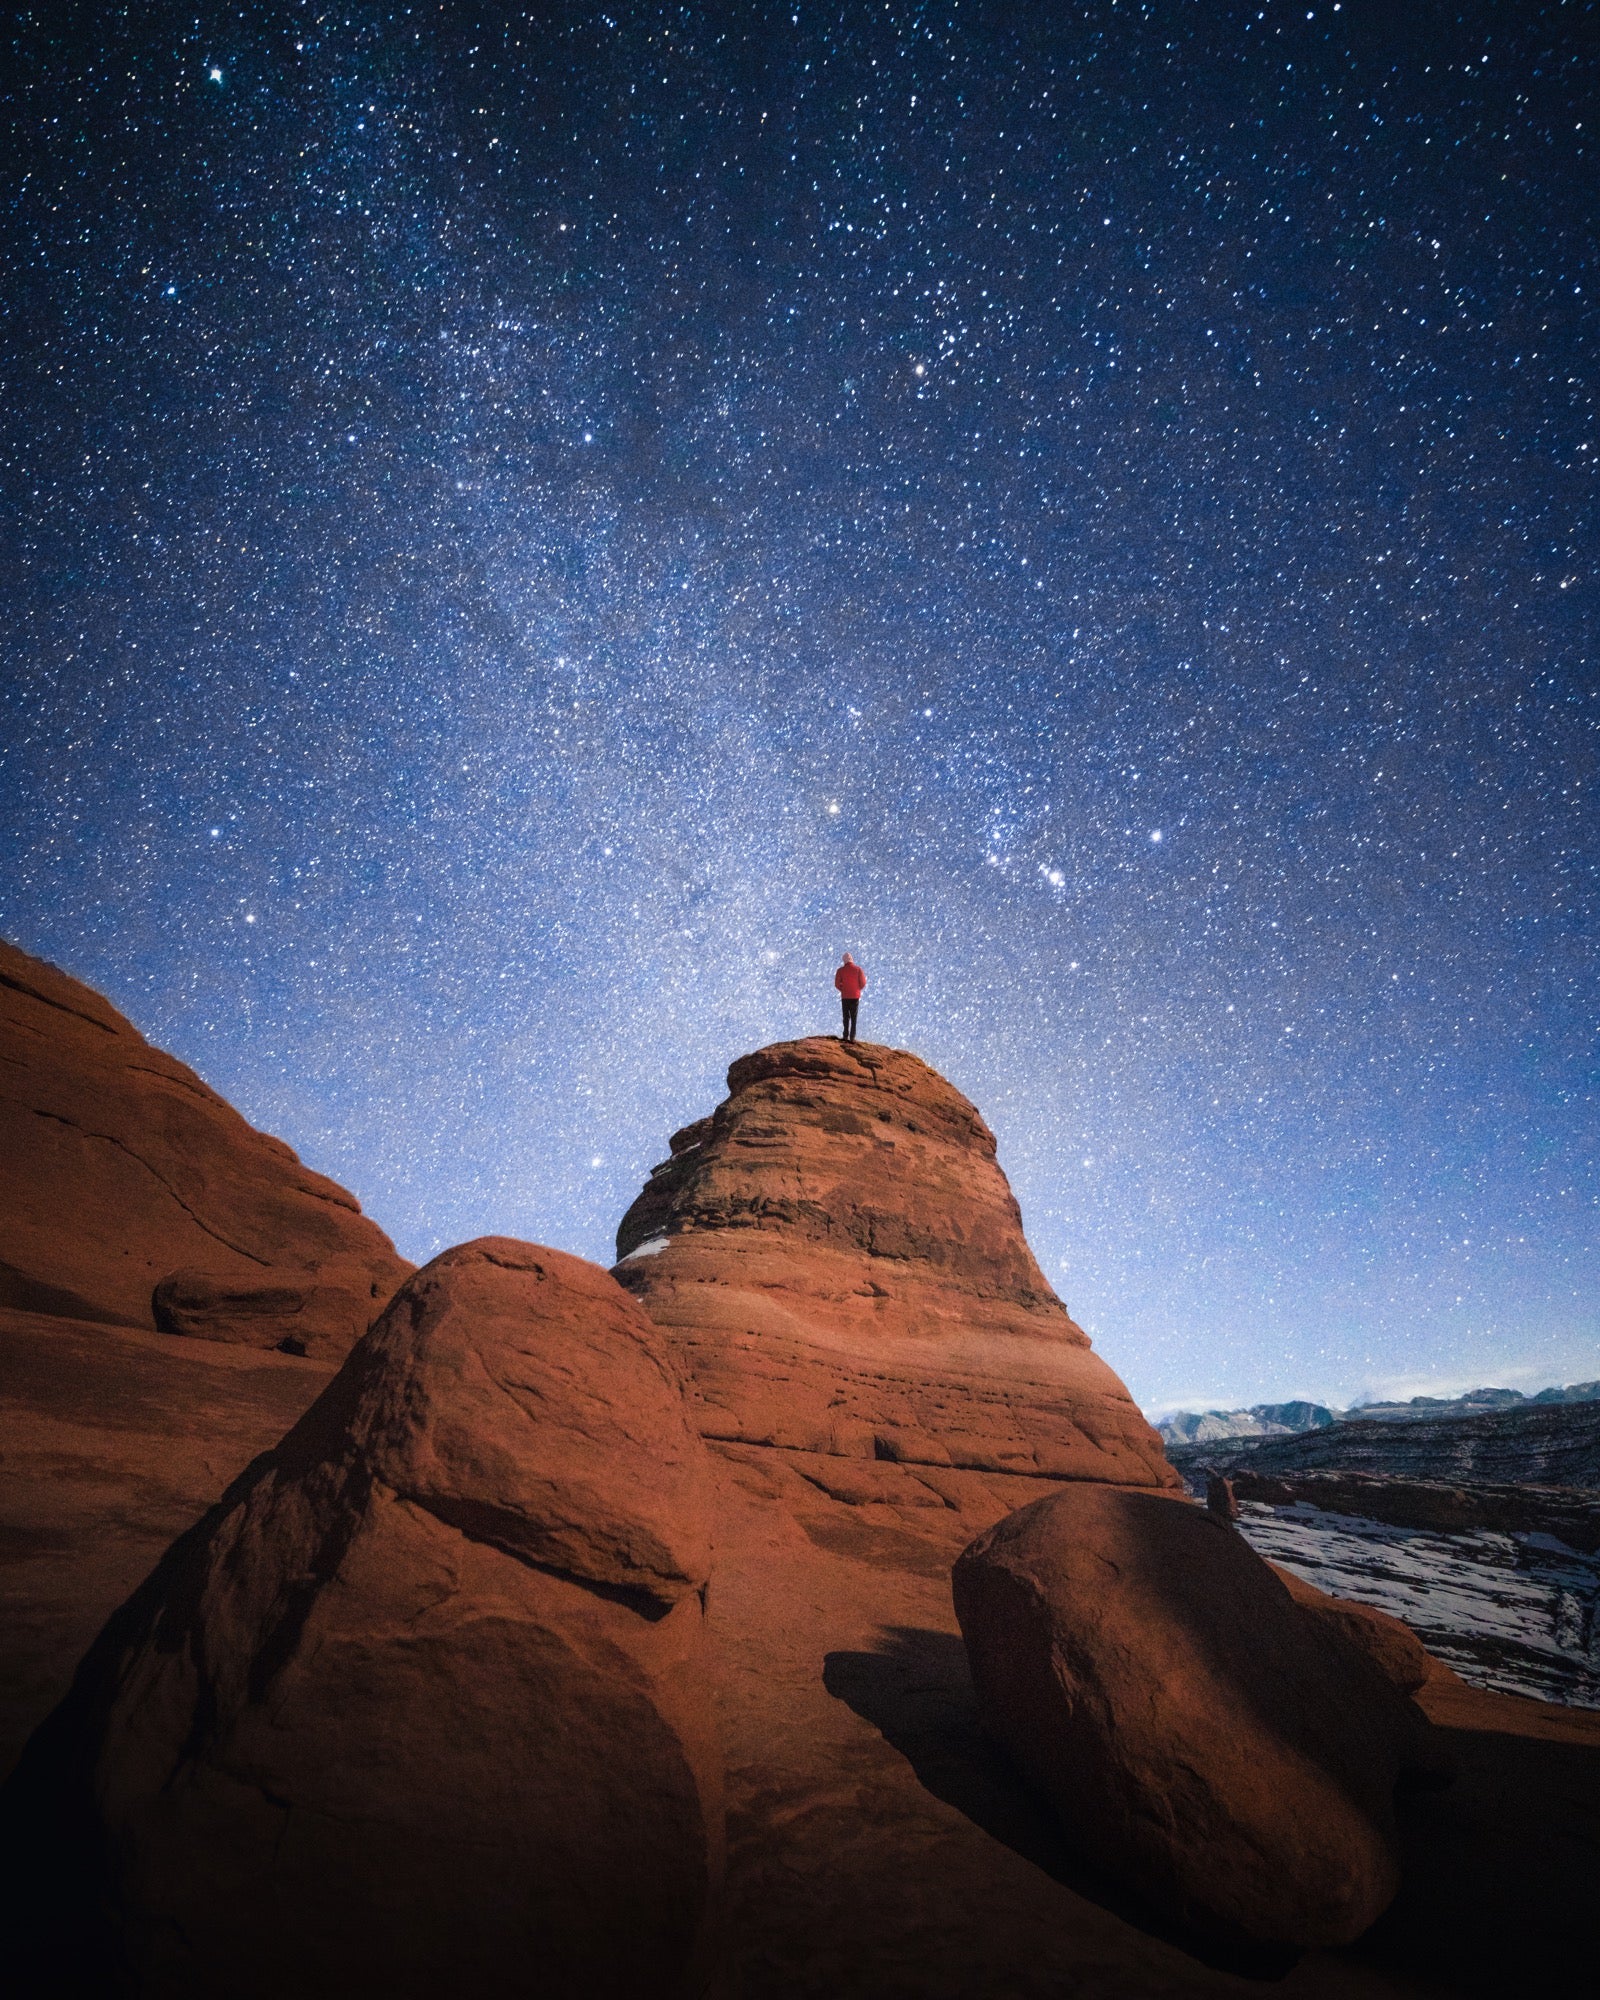
QUICK TIP: When shooting stars, choose a shutter speed faster than 500/focal length to avoid star trails.
If I’m anywhere near a place with a good night sky, I’ll rarely pass up a chance to shoot it. Arches National Park definitely fits the bill. The path up to Delicate Arch was covered in ice, so everyone that had arrived to shoot sunset left before it got too dark, leaving just me and two friends with the whole place to ourselves to shoot.
Just like any other shot, one of the keys to good astro work is finding a foreground that compliments the night sky. The moon was bright and too close to the core end of the Milky Way, making it too difficult to get a comp that I liked featuring Delicate Arch. But there were plenty of other interesting rock formations nearby, and I found one that perfectly aligned with the tail end of the Milky Way.
During a new or crescent moon, you will likely need to shoot two different exposures when capturing landscapes featuring the night sky – one that’s exposed for the foreground, and one that captures the night sky with pinpoint stars – and then combine them later during your edit. The night sky is actually rotating relative to earth, so with longer exposures you will notice motion blur coming from each star. Thankfully the moon illuminated enough of the landscape where I was able to capture both the landscape and stars in a single shot.
To capture stars without motion trails, select a shutter speed that’s no slower than 500/focal length. Since my focal length for this shot was 12mm, my shutter speed needed to be 42-seconds or faster (500/12 = 41.67). I always like to err on the safe side, and I had taken a few test shots and was happy with the sky and the landscape at 31-seconds and ISO 4000. The low-light capability of the α7R II really is impressive – at 4000 ISO I was still able to get a relatively noise-free shot and a final image that was one of my favorites from the trip.
Hopefully these tips can help you capture some epic landscape shots. As I said before, every shot is different – there are no “one size fits all” settings for every sunset, ocean wave or star-filled sky. Think of the settings you choose as your opportunity to put your unique signature on the shot. There are countless ways to shoot every scene. Imagine how you’d like the final shot to look, and then use your settings to help bring your perfect shot to life.

